
Flutter는 다양한 UI 위젯을 제공하여 앱 개발을 더욱 풍부하고 직관적으로 만들어 줍니다.
그중에서 LongPressDraggable 위젯은 사용자가 화면에서 아이템을 길게 눌러 드래그할 수 있게 해주는 유용한 위젯입니다.
이번 블로그 포스트에서는 LongPressDraggable 위젯의 사용 방법과 주요 옵션에 대해 초보자도 쉽게 이해할 수 있도록 설명하겠습니다.
1. LongPressDraggable란?
LongPressDraggable 위젯은 사용자가 화면에서 길게 눌러 아이템을 드래그할 수 있도록 해주는 위젯입니다.
드래그가 시작되면 사용자는 아이템을 다른 위치로 이동시킬 수 있으며, 이 과정에서 드래그 중인 아이템의 시각적인 피드백을 제공할 수 있습니다.
이 위젯은 일반적으로 리스트나 카드와 같은 UI 요소를 재배치하거나, 드래그 앤 드롭 기능을 구현할 때 사용됩니다.
2. LongPressDraggable 사용법
LongPressDraggable 위젯을 사용하는 방법은 간단합니다. 아래 코드를 통해 기본 사용법을 익혀보세요.
기본 사용법
import 'package:flutter/material.dart';

void main() {
  runApp(MyApp());
}

class MyApp extends StatelessWidget {
  @override
  Widget build(BuildContext context) {
    return MaterialApp(
      home: Scaffold(
        appBar: AppBar(title: Text('LongPressDraggable 예제')),
        body: DragExample(),
      ),
    );
  }
}

class DragExample extends StatelessWidget {
  @override
  Widget build(BuildContext context) {
    return Center(
      child: LongPressDraggable<String>(
        data: '드래그할 데이터',
        child: Container(
          padding: EdgeInsets.all(20),
          color: Colors.blue,
          child: Text(
            '길게 눌러서 드래그',
            style: TextStyle(color: Colors.white),
          ),
        ),
        feedback: Material(
          color: Colors.transparent,
          child: Container(
            padding: EdgeInsets.all(20),
            color: Colors.blue.withOpacity(0.5),
            child: Text(
              '드래그 중',
              style: TextStyle(color: Colors.white),
            ),
          ),
        ),
        onDragEnd: (details) {
          print('드래그 끝');
        },
      ),
    );
  }
}
위의 코드는 LongPressDraggable 위젯을 사용하여 텍스트를 길게 눌러 드래그할 수 있는 기본적인 예제입니다.
드래그 동안 UI 업데이트
드래그하는 동안 아이템의 시각적 피드백을 업데이트하려면 feedback 속성을 사용할 수 있습니다. 위의 예제에서 feedback은 드래그 중인 아이템의 비율을 조정하거나 다른 스타일을 적용하는 데 사용됩니다.
3. LongPressDraggable 주요 옵션
LongPressDraggable 위젯의 주요 옵션은 다음과 같습니다.
- data: 드래그 중인 아이템에 대한 데이터를 설정합니다. 이 데이터는 드래그가 끝난 후 DraggableTarget에서 사용할 수 있습니다.
- child: 기본 상태에서 표시되는 위젯입니다. 이 위젯은 길게 눌러서 드래그할 수 있습니다.
- feedback: 드래그하는 동안 화면에 표시될 위젯입니다. 일반적으로 Material 위젯과 함께 사용하여 시각적인 피드백을 제공합니다.
- onDragEnd: 드래그가 끝났을 때 호출되는 콜백입니다. 드래그 종료 위치나 상태를 기록할 때 유용합니다.
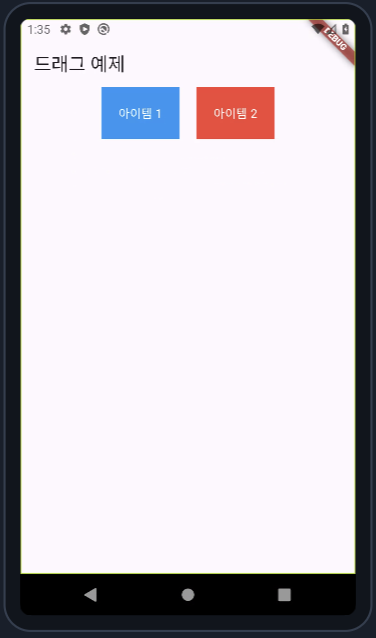
4. 실전 예제: Flutter 앱에 LongPressDraggable 추가하기
이제 LongPressDraggable을 활용한 실전 예제를 살펴보겠습니다. 이 예제에서는 두 개의 아이템을 드래그 앤 드롭으로 재배치할 수 있는 간단한 앱을 구현합니다.
import 'package:flutter/material.dart';

void main() {
  runApp(MyApp());
}

class MyApp extends StatelessWidget {
  @override
  Widget build(BuildContext context) {
    return MaterialApp(
      home: Scaffold(
        appBar: AppBar(title: Text('드래그 예제')),
        body: DragDropExample(),
      ),
    );
  }
}

class DragDropExample extends StatefulWidget {
  @override
  _DragDropExampleState createState() => _DragDropExampleState();
}

class _DragDropExampleState extends State<DragDropExample> {
  @override
  Widget build(BuildContext context) {
    return Row(
      mainAxisAlignment: MainAxisAlignment.center,
      children: <Widget>[
        LongPressDraggable<String>(
          data: '아이템 1',
          child: Container(
            padding: EdgeInsets.all(20),
            color: Colors.blue,
            child: Text(
              '아이템 1',
              style: TextStyle(color: Colors.white),
            ),
          ),
          feedback: Material(
            color: Colors.transparent,
            child: Container(
              padding: EdgeInsets.all(20),
              color: Colors.blue.withOpacity(0.5),
              child: Text(
                '아이템 1',
                style: TextStyle(color: Colors.white),
              ),
            ),
          ),
          onDragEnd: (details) {
            print('아이템 1 드래그 끝');
          },
        ),
        SizedBox(width: 20),
        LongPressDraggable<String>(
          data: '아이템 2',
          child: Container(
            padding: EdgeInsets.all(20),
            color: Colors.red,
            child: Text(
              '아이템 2',
              style: TextStyle(color: Colors.white),
            ),
          ),
          feedback: Material(
            color: Colors.transparent,
            child: Container(
              padding: EdgeInsets.all(20),
              color: Colors.red.withOpacity(0.5),
              child: Text(
                '아이템 2',
                style: TextStyle(color: Colors.white),
              ),
            ),
          ),
          onDragEnd: (details) {
            print('아이템 2 드래그 끝');
          },
        ),
      ],
    );
  }
}
이 예제는 두 개의 아이템을 드래그할 수 있는 기본적인 UI를 보여줍니다.
각 아이템을 드래그할 때 화면에 피드백이 나타나고, 드래그 종료 시 콜백이 호출됩니다.
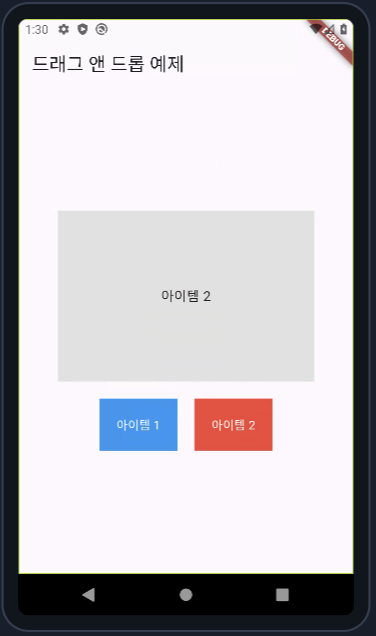
5. 실전 예제: Flutter 앱에 LongPressDraggable와 DragTarget으로 드래그앤 드롭 구현하기
import 'package:flutter/material.dart';

void main() {
  runApp(MyApp());
}

class MyApp extends StatelessWidget {
  const MyApp({super.key});

  @override
  Widget build(BuildContext context) {
    return MaterialApp(
      home: Scaffold(
        appBar: AppBar(title: Text('드래그 앤 드롭 예제')),
        body: DragDropExample(),
      ),
    );
  }
}

class DragDropExample extends StatefulWidget {
  const DragDropExample({super.key});

  @override
  _DragDropExampleState createState() => _DragDropExampleState();
}

class _DragDropExampleState extends State<DragDropExample> {
  String? _draggedItem;

  @override
  Widget build(BuildContext context) {
    return Center(
      child: Column(
        mainAxisAlignment: MainAxisAlignment.center,
        children: <Widget>[
          // 드래그된 아이템이 드롭될 수 있는 영역
          DragTarget<String>(
            onAccept: (data) {
              setState(() {
                _draggedItem = data;
              });
            },
            builder: (context, candidateData, rejectedData) {
              return Container(
                width: 300,
                height: 200,
                color: Colors.grey[300],
                child: Center(
                  child: Text(
                    _draggedItem ?? '여기에 드롭',
                    style: TextStyle(fontSize: 16),
                  ),
                ),
              );
            },
          ),
          SizedBox(height: 20),
          // 드래그 가능한 아이템들
          Row(
            mainAxisAlignment: MainAxisAlignment.center,
            children: <Widget>[
              LongPressDraggable<String>(
                data: '아이템 1',
                child: Container(
                  padding: EdgeInsets.all(20),
                  color: Colors.blue,
                  child: Text(
                    '아이템 1',
                    style: TextStyle(color: Colors.white),
                  ),
                ),
                feedback: Material(
                  color: Colors.transparent,
                  child: Container(
                    padding: EdgeInsets.all(20),
                    color: Colors.blue.withOpacity(0.5),
                    child: Text(
                      '아이템 1',
                      style: TextStyle(color: Colors.white),
                    ),
                  ),
                ),
                onDragEnd: (details) {
                  print('아이템 1 드래그 끝');
                },
              ),
              SizedBox(width: 20),
              LongPressDraggable<String>(
                data: '아이템 2',
                child: Container(
                  padding: EdgeInsets.all(20),
                  color: Colors.red,
                  child: Text(
                    '아이템 2',
                    style: TextStyle(color: Colors.white),
                  ),
                ),
                feedback: Material(
                  color: Colors.transparent,
                  child: Container(
                    padding: EdgeInsets.all(20),
                    color: Colors.red.withOpacity(0.5),
                    child: Text(
                      '아이템 2',
                      style: TextStyle(color: Colors.white),
                    ),
                  ),
                ),
                onDragEnd: (details) {
                  print('아이템 2 드래그 끝');
                },
              ),
            ],
          ),
        ],
      ),
    );
  }
}
코드 설명
- 드래그 앤 드롭 영역
- DragTarget 위젯을 사용하여 드래그된 아이템이 놓일 수 있는 영역을 정의합니다.
- onAccept 콜백을 사용하여 드래그된 데이터(data)를 받아 상태를 업데이트합니다.
- builder 메서드에서 현재 드래그된 아이템을 표시하거나, 기본 텍스트를 표시합니다.
- 드래그 가능한 아이템들
- LongPressDraggable 위젯을 사용하여 드래그 가능한 아이템을 생성합니다.
- feedback 속성을 사용하여 드래그 중에 보여질 시각적 피드백을 설정합니다.
- onDragEnd 콜백을 사용하여 드래그가 끝났을 때의 동작을 정의합니다.
- 레이아웃
- Column과 Row 위젯을 사용하여 UI를 배치합니다. 드래그 앤 드롭 영역을 중앙에 배치하고, 드래그 가능한 아이템을 아래쪽에 위치시킵니다.
이 코드를 사용하면 드래그 앤 드롭 기능이 정상적으로 작동하며, 사용자가 드래그 가능한 아이템을 드롭 영역으로 드래그하여 놓을 수 있습니다.
6. 마무리 및 팁
LongPressDraggable 위젯은 사용자가 화면에서 아이템을 드래그할 수 있게 해주는 강력한 도구입니다.
이 위젯을 활용하여 더 나은 사용자 경험을 제공하고, 앱의 인터랙티브한 기능을 강화해 보세요.
다양한 옵션을 활용해 여러분의 앱에 맞게 커스터마이징하는 것이 중요합니다.
Starting Google Play App Distribution! "Tester Share" for Recruiting 20 Testers for a Closed Test.
Tester Share [테스터쉐어] - Google Play 앱
Tester Share로 Google Play 앱 등록을 단순화하세요.
play.google.com
'Flutter > Widget' 카테고리의 다른 글
| 플러터 Checkbox 위젯 완벽 가이드: 사용법과 주요 옵션 알아보기 (0) | 2024.08.21 |
|---|---|
| 플러터 Expansion Tile 위젯 완벽 가이드: 사용법과 주요 옵션 총정리 (0) | 2024.08.21 |
| 플러터에서 TabBar 위젯 사용법 및 옵션: 탭 기반 UI 완벽 가이드 (0) | 2024.08.11 |
| 플러터에서 MaterialBanner 위젯 사용법: 알림 메시지를 우아하게 표시하는 방법! (0) | 2024.08.11 |
| 플러터에서 SelectableText 위젯 사용법 및 옵션 가이드 (0) | 2024.08.09 |


